Understanding Blade Geometry
The foundation of effective skate sharpening comes from understanding blade geometry. Let’s break down the key components:
Blade Hollow
The blade hollow refers to the concave groove running along the bottom of your skate blade. This hollow significantly impacts your skating performance, affecting grip, maneuverability, and glide.
Hollow depth is typically measured in fractions of an inch, ranging from 1/4″ to 1″. A deeper hollow (smaller fraction) provides more bite into the ice, offering better grip and control.
A shallower hollow (larger fraction) allows for smoother gliding but may reduce overall control.
Choosing the right hollow depth depends on several factors:
- Skating discipline (figure skating, hockey, speed skating)
- Skater’s weight and strength
- Ice conditions
- Personal preference
For example, many hockey players prefer a 1/2″ hollow as it offers a good balance between speed and control. Figure skaters often opt for a deeper hollow, around 7/16″ or 3/8″, to help with precise edge work and landings.
Edge Bevel
The edge bevel is the angle at which the side of the blade meets the bottom. A typical bevel angle is around 90 degrees, but slight variations can significantly affect skating performance.
A more acute angle (less than 90 degrees) provides a sharper, more aggressive edge, while a more obtuse angle offers smoother gliding. Some advanced skaters even use different bevel angles on their inside and outside edges to improve their performance.
The Sharpening Process
Now that we’ve covered the basics of blade geometry, let’s walk through the sharpening process step by step.
1. Blade Inspection
Before sharpening, carefully inspect the blade for any damage or irregularities. Look for nicks, burrs, or signs of rust.
If you spot any significant damage, it may be necessary to have the blade repaired or replaced before sharpening.
2. Blade Alignment
Proper blade alignment is crucial for even sharpening. Most professional sharpening machines have built-in alignment tools, but if you’re sharpening manually, you’ll need to confirm the blade is perfectly centered.
3. Grinding
This is where the magic happens. The blade is passed over a spinning grinding wheel to create the desired hollow.
The speed and pressure applied during this process are critical factors in achieving a consistent edge.
When sharpening manually, maintain a steady hand and consistent pressure throughout the grinding process. Uneven pressure can lead to an inconsistent edge, which will negatively impact your skating performance.
4. Cross-Grinding
Some sharpeners employ a technique called cross-grinding, where the blade is passed over the wheel at a slight angle. This helps remove any microscopic grooves left by the main grinding process, resulting in a smoother edge.
5. Deburring
After grinding, a small burr (a thin edge of displaced metal) is left on the blade. This needs to be carefully removed to create a clean, sharp edge.
Deburring is typically done with a handheld stone or specialized tool.
6. Finishing
The final step involves polishing the blade to remove any remaining imperfections. This can be done with a fine-grit stone or a leather strop.
Advanced Techniques
For those looking to take their skating to the next level, there are several advanced sharpening techniques to consider.
Rockering
Rockering involves slightly raising the front and back of the blade, creating a more pronounced curve. This can enhance maneuverability, especially for figure skaters and hockey players who need quick turns and transitions.
To rocker a blade:
- Determine the desired rocker radius based on your skating style and preferences.
- Use a specialized rocker bar or jig to guide the sharpening process.
- Gradually remove material from the blade’s ends while maintaining the central portion.
- Check the rocker profile frequently to confirm symmetry and desired curvature.
Flat Bottom V
This technique creates a flat section at the bottom of the hollow, resulting in two distinct edges. It can provide increased stability and glide, particularly useful for heavier skaters or those skating on softer ice.
To create a Flat Bottom V:
- Start with a standard hollow grind.
- Use a specialized Flat Bottom V tool or attachment on your sharpening machine.
- Make many passes to gradually flatten the center of the hollow.
- Check the width of the flat section and adjust as needed.
Custom Profiling
Blade profiling involves altering the overall shape of the blade to improve performance for specific skating styles. This can include adjusting the rocker radius, pitch, or even creating many radius points along the blade.
To create a custom profile:
- Analyze your skating style and identify areas for improvement.
- Work with a professional skate technician to design a custom profile.
- Use specialized profiling equipment to gradually reshape the blade.
- Test the new profile and make adjustments as needed.
Common Pitfalls and How to Avoid Them
Even with the best intentions, there are several mistakes that can occur during the sharpening process. Here are some common pitfalls and how to avoid them:
Over-sharpening
Excessive sharpening can wear down your blades prematurely. Stick to a regular sharpening schedule based on your skating frequency and intensity.
For most recreational skaters, sharpening every 15-20 hours of ice time is enough.
Inconsistent Pressure
Uneven pressure during manual sharpening can lead to an inconsistent edge. Practice maintaining steady pressure, or consider using a sharpening jig for more consistent results.
If you’re new to sharpening, start with lower pressure and gradually increase as you gain confidence and skill.
Neglecting Deburring
Failing to properly deburr the blade can leave a weak, fragile edge that quickly deteriorates. Take your time with this crucial step.
Use light, consistent strokes with your deburring tool, and check your progress often.
Ignoring Blade Alignment
Misaligned blades can result in uneven sharpening and poor skating performance. Always double-check your blade alignment before sharpening.
Use a straight edge or alignment tool to confirm the blade is centered and level in the holder.
Using the Wrong Hollow
Choosing a hollow that doesn’t match your skating style or ice conditions can hinder your performance. Experiment with different hollows to find what works best for you.
Keep a log of different hollow depths and how they affect your skating to help you make informed decisions in the future.
Adapting to Different Scenarios
The beauty of ice skate sharpening is it’s versatility. You can adapt your sharpening technique to suit various scenarios:
Soft Ice
For softer ice conditions, consider a shallower hollow to prevent your blades from digging in too deeply. A hollow between 5/8″ and 3/4″ can provide better glide and reduce fatigue on soft ice.
Hard Ice
Harder ice may need a deeper hollow to confirm adequate grip. Try a hollow between 3/8″ and 1/2″ to maintain control and edge bite on firm surfaces.
Outdoor Rinks
When skating outdoors, where ice conditions can be unpredictable, a medium hollow (around 1/2″) often provides a good balance. This versatile hollow depth can handle a range of ice conditions you might encounter in outdoor settings.
Competition vs. Practice
Some skaters prefer a slightly different sharpening for competition compared to practice sessions. For instance, you might opt for a deeper hollow during competitions for most control.
Experiment with different hollows during practice to find your ideal competition setup.
Building on the Basics
As you become more familiar with skate sharpening, you’ll start to develop a keen sense of how subtle changes in blade geometry affect your skating. This knowledge builds upon the basics and leads to further mastery of your craft on the ice.
You’ll begin to notice how different hollows feel under your feet, how the edge bevel impacts your turns, and how the overall blade profile influences your stride. This heightened awareness will improve your skating and help you talk more effectively with professional sharpeners about your preferences.
Exercises to Reinforce Learning
To truly understand the impact of different sharpening techniques, nothing beats hands-on experience. Here are some exercises to help you develop your skate sharpening skills:
Hollow Comparison
Have your skates sharpened with different hollow depths on each foot (e.g., 1/2″ on one skate, 3/8″ on the other). Skate with these for a session and note the differences in feel and performance.
Pay attention to how each hollow affects your starts, stops, turns, and overall stability.
Edge Awareness Drills
Practice edge control exercises, such as one-foot glides and tight turns, after each sharpening. This will help you become more attuned to how the blade interacts with the ice.
Try exercises like:
- Single-foot slalom: Practice weaving back and forth on one foot, focusing on smooth edge transitions.
- Figure eights: Perform tight figure eights, concentrating on clean, crisp edge changes.
- Hockey stops: Practice quick stops on both sides, noting how the edges grip the ice.
Sharpening Log
Keep a detailed log of your sharpenings, including the hollow depth, any special techniques used, and how the skates performed afterward. This will help you track your preferences over time.
Include notes on:
- Date of sharpening
- Hollow depth
- Edge bevel angle (if known)
- Ice conditions
- Your weight (as this can change over time and affect optimal sharpening)
- Performance notes (grip, glide, stability, etc.)
DIY Sharpening
If you’re interested in learning to sharpen your own skates, start with an old pair of blades to practice on. Focus on maintaining consistent pressure and achieving an even edge before moving on to your main skates.
Begin with these steps:
- Practice setting up the blade in the holder correctly.
- Work on maintaining a consistent angle and pressure during grinding.
- Master the deburring process using various tools.
- Experiment with different hollow depths on your practice blades.
Here are Blade Sharpening Tools you can find on amazon:

Skate Blade Sharpener
- It contains both a v-shaped sharpening edge and a sharpening stone to easily sharpen your ice skates.
- They are compact and easy to carry and use.
- You will receive 2 multifunctional ice re-edger sharpeners.
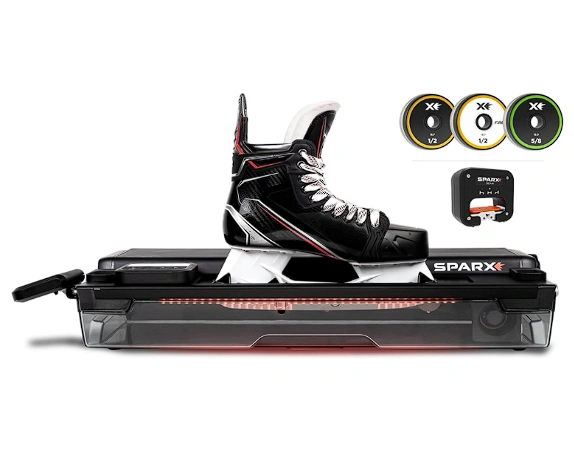
Automated Sharpening Machines
- Bluetooth Connected Laser Alignment and Edge Checker
- Connect Sharpener to Sparx Hockey App for Enhanced Features
- Integrated on-board Air Filter System
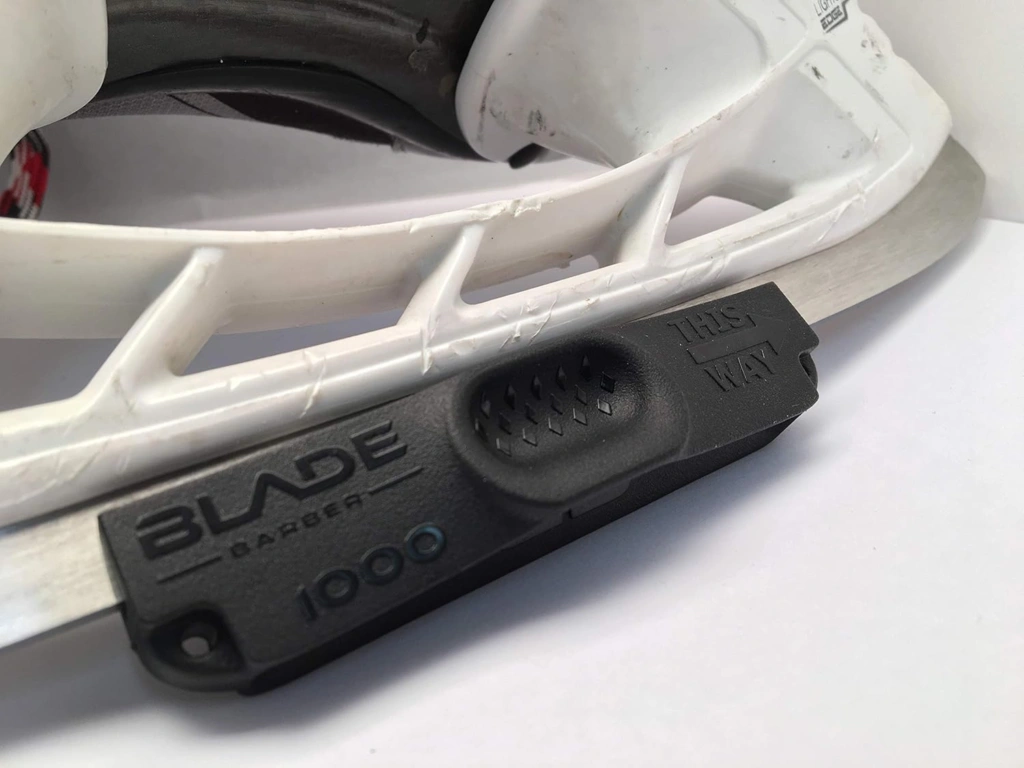
Portable Sharpening Tools
- works on all blade types (hockey, figure, goalie) and thicknesses
- will sharpen 25-30 pairs of skates before dulling
Ice Condition Analysis
Before each skating session, take a moment to assess the ice conditions. Try to forecast how your current sharpening will perform and note any adjustments you might make for future sessions.
Here are some cutting-edge tools and techniques that are changing the game:
Automated Sharpening Machines
High-end automated sharpening machines offer precision and consistency that’s hard to match with manual sharpening. These machines can copy exact hollow depths and edge profiles with remarkable accuracy.
3D Blade Scanning
Some advanced sharpening systems now incorporate 3D scanning technology. This allows for precise measurement of blade geometry and wear patterns, enabling more accurate and personalized sharpening.
Computer-Aided Profiling
Computer-aided design (CAD) software is being used to create custom blade profiles tailored to person skaters’ needs. This technology allows for incredibly precise adjustments to rocker radius, pitch, and other blade characteristics.
Portable Sharpening Tools
For skaters on the go, portable sharpening tools are becoming increasingly popular. While not as precise as full-size machines, these compact devices can provide quick touch-ups between professional sharpenings.
The Environmental Impact of Skate Sharpening
As we become more environmentally conscious, it’s important to consider the ecological impact of skate sharpening. Here are some ways to make your sharpening practices more sustainable:
Recycling Steel Shavings
The steel dust and shavings produced during sharpening can be recycled. Many professional sharpening services collect and properly dispose of these materials.
Water-Based Coolants
Some sharpening machines use coolants to prevent overheating. Opt for water-based, biodegradable coolants when possible to reduce environmental impact.
Energy-Efficient Equipment
When choosing sharpening equipment, look for energy-efficient models that consume less power during operation.
Blade Life Extension
Proper sharpening and maintenance can extend the life of your blades, reducing the need for frequent replacements and minimizing waste.
The Future of Skate Sharpening
As technology continues to advance, we can expect to see even more innovations in the field of skate sharpening. Some potential developments on the horizon include:
AI-Assisted Sharpening
Artificial intelligence could be used to analyze a skater’s style, weight, and preferences to recommend optimal sharpening settings.
Nano-Engineered Blade Coatings
New blade coatings at the nanoscale could provide enhanced durability and performance, potentially reducing the frequency of sharpening needed.
Virtual Reality Training
VR technology could be used to train new sharpeners, allowing them to practice techniques in a risk-free virtual environment before working on real blades.
Sustainable Materials
Research into more sustainable blade materials could lead to skates that need less frequent sharpening and have a lower environmental impact.
Frequently Asked Questions
How often should I sharpen my ice skates?
The frequency of sharpening depends on how often you skate and the conditions you skate in. As a general rule, sharpen your skates every 15-20 hours of ice time or when you notice a decrease in performance.
Can I sharpen my own ice skates at home?
Yes, you can sharpen your skates at home with the right tools and practice. However, it needs skill and patience to achieve professional-quality results.
Many skaters prefer to leave sharpening to experienced professionals.
What’s the best hollow depth for hockey skates?
There’s no one-size-fits-all answer, but many hockey players prefer a 1/2″ hollow as it offers a good balance of speed and control. Your ideal hollow may vary based on your weight, playing style, and ice conditions.
How do I know if my skates need sharpening?
Signs that your skates need sharpening include difficulty stopping, less responsive edges, and a general feeling of instability on the ice. You can also visually inspect the blade edges for nicks or dullness.
What’s the difference between figure skate and hockey skate sharpening?
Figure skates typically need a deeper hollow (often 7/16″ or 3/8″) for precise edge work, while hockey skates usually use a shallower hollow (1/2″ to 5/8″) for better glide and speed.
Can changing my blade hollow improve my skating?
Yes, adjusting your blade hollow can significantly impact your skating performance. A deeper hollow provides more grip and control, while a shallower hollow offers better glide and speed.
What causes rust on ice skate blades?
Rust on skate blades is typically caused by moisture left on the blade after skating. Always dry your blades thoroughly and use blade soakers to absorb any remaining moisture.
How do I prevent my skate blades from rusting?
To prevent rust, dry your blades immediately after skating, use blade soakers, and occasionally apply a thin layer of blade oil. Store your skates in a dry place with good air circulation.
What’s the purpose of the toe pick on figure skates?
The toe pick on figure skates is used for jumps, spins, and other technical elements. It provides traction for takeoffs and helps with certain stopping techniques.
Can I use the same sharpening techniques for speed skates?
Speed skates need different sharpening techniques because of their longer blades and unique shape. They typically use a much flatter profile and may need specialized equipment for proper maintenance.
Affiliate Disclaimer: SkateNavigator.com may include affiliate links, which allow us to earn a small commission when you make a purchase through them. This helps support our site at no extra cost to you. Thank you for your support!

Your words don’t just speak to the mind; they reach deep into the soul, evoking a response that lingers long after reading.